Where to start when buying a new kitchen
It’s not often you buy a new kitchen, so knowing where to start can be daunting. A little research helps you make informed decisions and find the best kitchen solution for your home. This guide navigates the steps to a new kitchen, shows you what to look out for and provides insights from years of experience in the industry.
1. Collect Ideas and Styles
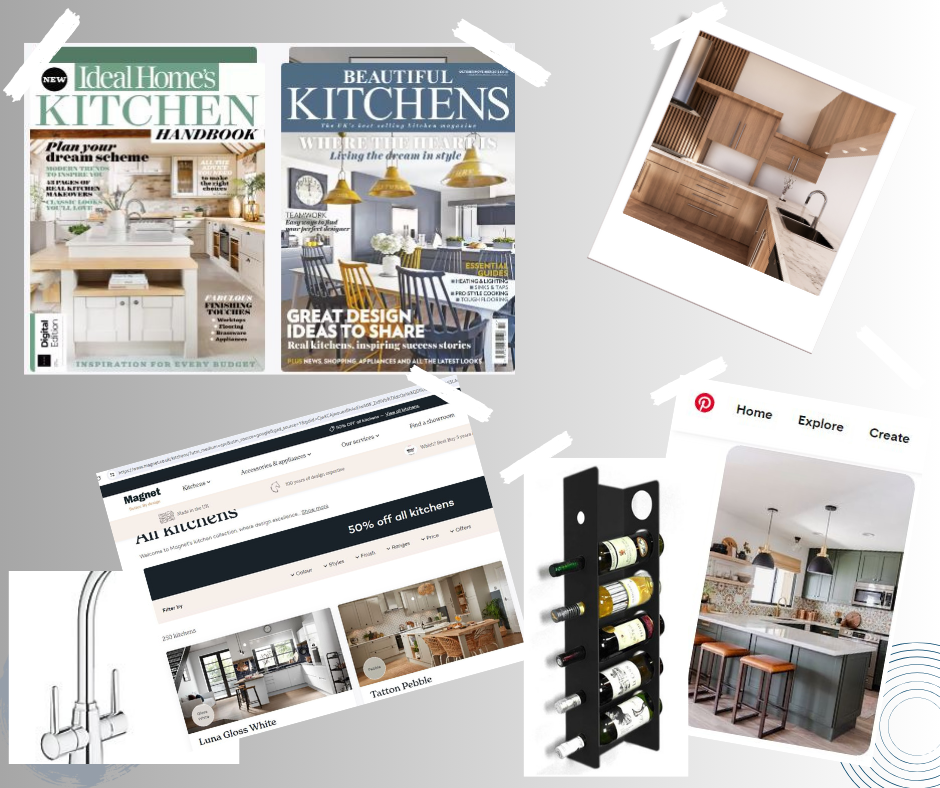
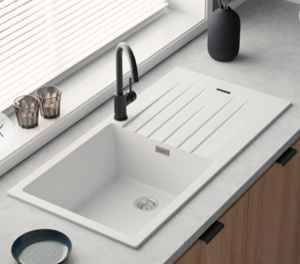
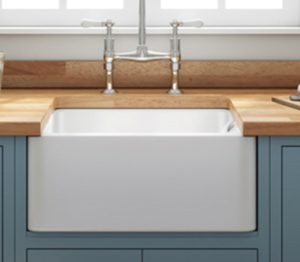
Start noting styles that appeal to you – Browse magazines, showrooms and websites.
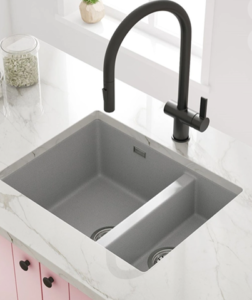
Create a wish list of features you would like (wine racks, kettle tap, deep pan drawers etc.)
TIPS:
Think about what works works well in your existing kitchen and what pain points you want to remove.
Consider the natural light in your room – a darker room may benefit from a lighter cabinet colour, gloss finish and extra lighting features.
Be realistic about your space – islands are elegant when there’s space for them, but can be a regret if squeezed in. Breakfast bars or peninsulas may be a better alternative.
Choose a design that compliments your house, a modern sleek kitchen can feel out of place in a Victorian property.
2. Do your homework
Research Retailers
It may come down to choosing a supplier based on who sells the style you like, but look around at the options:
(£) Online suppliers e.g. DIY-Kitchens – Reviews praise the quality and price, but you need to be comfortable measuring, designing and arranging the installation yourself.
(££) High street suppliers e.g. Wren, Wickes, Homebase, John Lewis, Ikea, B&Q, Magnet – They can manage the end-to-end process for you or just supply the kitchen.
(££) Trade suppliers e.g. Howdens, Benchmark – Only sell to Trade account holders, so you’d need to go through a local kitchen installer.
(££-£££) Local Independent suppliers – Range from cheaper than high street, to high end custom made services. Ask around for recommendations in your area.
Choosing Kitchen Cabinets
Most homeowners primary concerns are the finished look and durability of their new kitchen. These are influenced by the materials your kitchen is made from, so it’s worth understanding what you are buying and what to look out for.
Type of Unit: Flatpack units are cheaper than premade units, but they’ll take longer to install, and your installation price will be higher because the fitter must assemble them.
Cabinet Carcass: UK Kitchen cabinets are mostly made from 18mm MFC (Melamine Face Chipboard). The quality of finish can vary, so look carefully and feel the end product if possible.
Carcass backboards can be thinner (down to 4mm) to reduce costs. Whilst not visible in your kitchen, they don’t have the solid screw and dowel fixings of a higher-end unit.
Carcass Edging is not just decorative, it’s there to protect and ranges in quality. A good quality kitchen unit will have every panel edged on all sides with ABS or PVC, which protects well from moisture and chipping. Cheaper units have a thinner “paper” edge that is not so durable. They may also only have the front faces edged to save on manufacturing cost.
Cabinet Doors: The cabinet doors can be a different material to the carcass, e.g. solid wood doors on MFC carcass. Most common door types:
- Solid wood: Can be sprayed, painted, stained, varnished, lacquered
- Pro: Strong and durable
- Con: Expensive, can chip if paint finished
- Veneer: e.g. MDF covered with one layer of thin real wood.
- Pro: Aesthetics of real wood but eco-friendlier and more affordable
- Con: Softer than solid wood
- Vinyl Wrap: MDF core bonded to a heat-activated vinyl sheet
- Pro: Cost-effective
- Con: Have had some delamination issues. So check the length of guarantee
- Laminate: Various constructions of a surface material made from paper and resin, pressed together under heat.
- Pro: Attractive decor & easy to maintain
- Con: Limited styles
- Melamine: A cheaper laminate product
- Pro: Easy to clean & cost effective
- Con: Some options are prone to edging damage with 0.4mm “iron-on” edging tape. But doors edged with 1mm or 2mm ABS plastic greatly improves the durability.
- Acrylic: Either solid acrylic or MDF with a 2mm clear acrylic layer, has a gloss finish
- Pro: Easy to clean, sleek modern look
- Con: Limited door styles, shows fingerprints and can be scratched
- Smooth Painted: MDF that’s been laminated, primed & spray-painted
- Pro: Can be touched up or re-sprayed
- Cons: Potential chipping over time
Hinges: Not all hinges are created equal and whilst more expensive, a quality hinge gives lasting stability and soft-close. Recommended manufacturers include Blum, Titus and Grass
Choosing Kitchen Worktops
The quality of countertop materials can vary across suppliers, but here’s a general comparison of the most common kitchen worktops:
| Worktop Material | Average Price | Durability (/5) | Ease of Cleaning (/5) | Comments |
| Marble: Natural Rock | £££ | 3.5 | 4 | Elegant and long-lasting if looked after. Needs regular sealing to prevent stains and scratches. Can suffer chips and dents. |
| Quartz: Engineered stone formed into a slab | ££ – £££ | 4.1 | 5 | Holds up well against stains, scratches and chips. Low maintenance (occasional buffing out of scratches). |
| Granite: Natural Rock | ££ – £££ | 4.3 | 4 | Sealing annually is recommended to prevent staining. Holds up well to scratches and rare chips can be filled with epoxy resin. |
| Corian: Manmade from polymer and natural minerals | ££ | 3.5 | 5 | Very hot pans can leave scorch marks and can scratch. Low maintenance (occasional buffing out of scratches). |
| Solid Wood: Natural Oak, Walnut etc | £ – ££ | 3 | 3 | Look amazing but need regular oiling to prevent stains and occasional light sanding to remove scratches. |
| Laminate: Multiple layered materials fused together with a topcoat | £ | 3.5 | 5 | Easy to clean and stain resistant. Very hot pans will cause damage, and can show scratches and nicks. |
Laminate is a popular choice due to its value for money, minimal maintenance, durability and wide range of colours. Quartz & Granite can be good choices for a more luxurious look.
Choosing Appliances
Many people opt for integrated appliances (these are built into the kitchen units with matching front panels) because they blend seamlessly with the rest of the kitchen. These are more expensive than freestanding appliances and take longer to install.
Most kitchen suppliers sell a variety of branded appliances, or you could source your own. Things to consider:
 Noise – In open plan spaces, a dishwasher/washing machine can be an irritating distraction
 Size – Obviously it needs to fit in the available space so check the height, width and depth dimensions
 Capacity – Inside space of an oven, dishwasher, washing machine
 Energy efficiency – Check the label
 Cleaning & maintenance – Check the lifespan & look for features such as self-cleaning options
 Power rating – Especially important for induction hobs, an additional electrical circuit may be needed
Choosing Sinks & Taps
Sinks & Taps come in many shapes and sizes and are made of various materials
Inset sinks fit onto a hole cut in the worktop
Pro: Cost effective, suit most worktop types, easy to install
Con: Visible lip may collect crumbs and is more effort to clean. Not so sleek looking
Undermount sinks are installed below the level of your worktop
Pro: Easy to clean and handy for sweeping crumbs into
Con: Only suitable with solid worktops (like quartz or granite) as water can seep into laminates
Butler or Belfast sinks are exposed at the front
Pro: Can be a stunning focal point, easy to clean, can accommodate larger pots and pans
Con: Can chip if knocked with something heavy. Due to the depth they can cause back ache for taller people.
Common sink configurations are single bowl / double bowl /one large & one small bowl
One bowl takes up less space on the counter, as well as losing less underneath cupboard space. But two bowls are handy if you are washing up whilst someone else is filling the kettle, or you want one soapy bowl and one clean for rinsing dishes.
Drainage options include integrated to sink, grooves cut into the worktop (granite, quartz, wood) or a freestanding drainage rack. Consider how much washing up you will be doing v using a dishwasher.
Sink Materials
- Stainless Steel
- Pro: Easy Cleaning, Value for money
- Con: Can be noisy, not scratch resistant and cheaper options can feel “thin and wobbly” around the tap area.
- Composite
- Pro: Good range of colour choices, tough & durable
- Con: Only available in matt and need to be careful on choice of cleaning products
- Ceramic (e.g. Belfast sink)
- Pro: Durable, low maintenance
- Con: Can chip (but this is rare)
- Resin
- Pro: Cost Effective & looks similar to quartz and granite
- Con: Not so heat resistant and vulnerable to harsh cleaning chemicals
Taps
Choose taps in unison with your sink. Not all taps fit all sinks e.g. sinks can come with one, two or three tap holes.
Check suitability for the water pressure in your house. Gravity-fed systems have lower pressure while combi boilers have higher pressure. Tap manufacturers will state what system their products suit.
Types of Tap:
Single Lever – One control and one spout for both hot & cold
Twin Lever – Two controls, one spout
Mixer tap – Hot & Cold comes out of one spout and give great control over temperature
Pull-out tap – Usually a mixer tap with a nozzle you can pull out to provide greater reach in the sink
Filter tap – A mixer tap that filters out impurities. Reduces scale in kettles and saves using a filter jug or buying bottled water. Does take up more undercounter space and is more work to install
Boiling water tap – A tap that provides immediate boiling water as well as conventional hot and cold water. More efficient than boiling a kettle, many have built in safety-features and filters that reduce limescale. These do take up cupboard space, need professional installing and periodic services/filter changes.
Chrome taps are bright, shiny and cheaper, but can scratch & show fingerprints. Stainless Steel are durable & easy to clean, but more expensive. There are also coloured tap options on the market..
Choosing Kitchen Flooring
Generally, wall to wall flooring in your kitchen is best. It gives a neat and professional look, allows appliances to be slid out for maintenance/replacement and gives you the option to change cabinets in future. An exception to this is floating floors as they need to expand and contract, so should not have cabinets placed on top.
The alternative is up to unit flooring. This will reduce your flooring costs, but it’s advisable to run the flooring under the appliances for ease of maintenance.
Types of kitchen flooring:
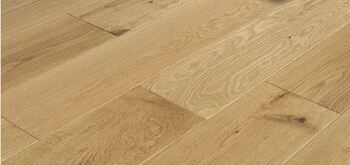
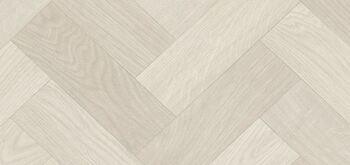
Hardwood Flooring
Pro: Softer under foot, can be re-sanded to freshen up
Con: Can dent, susceptible to water and staining
Vinyl Flooring
Pro: Easy to clean, versatile, cost effective, easy to install, waterproof
Con: May need replacing after 10 years
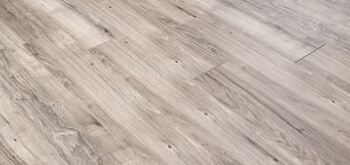
Laminate Flooring
Pro: Cost effective, easy to clean, scratch resistant, easier to install
Con: Not waterproof and spills will need to be moped immediately
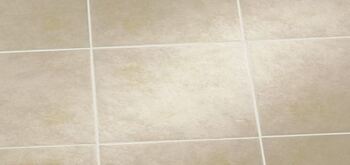
Ceramic Floor Tiles
Pro: Durable, Water resistant, wide choice, easier to install than porcelain tiles
Con: Cold/uncomfortable to stand on. Can crack if not installed properly
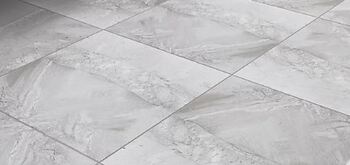
Porcelain Floor Tiles
Pro: Stronger than ceramic tiles
Con: Harder to cut/install

Stone Floor Tiles
Pro: Durable, look luxurious
Con: Porous so can stain, needs regular sealing
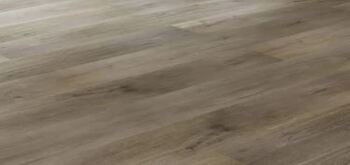
LVT (Luxury Vinyl Tile)
Pro: Durable and easy to clean and waterproof
Con: Soft material, can discolour, hard to remove if glued down
Wall tiles & Splashbacks
A kitchen splashback is a sheet of glass, acrylic, stainless steel attached to the wall for protection, usually behind your hob or sink. Alternatively you can use wall tiles.
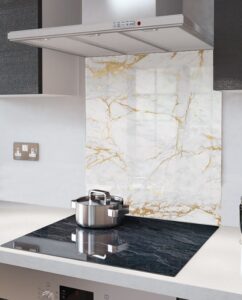
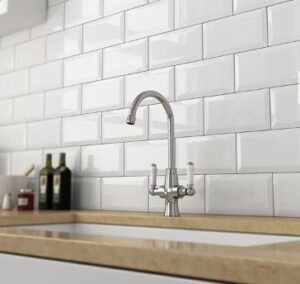
| Glass Splashback | Acrylic Splashback | Steel Splashback | Tiles |
| Sleek and Modern Available in many designs Can potentially crack Need regular cleaning | Cheaper than glass Available in many designs Easy to clean Not suitable behind all hobs | Can appear industrial Heat & Water resistant Need more cleaning Can scratch over time | Longer but simpler to install Timeless, classic designs Grout between tiles can be hard to clean |
Lighting
Often overlooked, lighting is an important part of planning a kitchen and can have a dramatic effect on the overall look and feel of your new kitchen. At a minimum plan for ceiling and pelmet lighting so your kitchen is functional. Other lighting can be added for the wow factor. With all your lighting consider dimmer switches & motion detectors.
Ceiling Lights
Pendant lights – effective over a dining table or island and have a huge array of designs and styles.
Spotlights – a focused beam, can be adjusted to point in a specific direction
Downlights – a more uniform light with a wider beam than a spotlight.
Track lighting – multiple lights attached to one track that can individually be adjusted.
Pelmet Lighting
If you only have ceiling lights, there will likely be “dark spots” in your kitchen. Pelmet lights sit discreetly behind the pelmet (The board at the base of your wall units) and create “Task Lights” to illuminate shaded areas where you need good visibility, for chopping vegetables, washing up etc.
In-Cabinet Lights
Illuminate glass-fronted cabinets to create a stunning display. With glass shelves you only need lights at the top, but solid shelves may need lights fitted below each one.
Wall lighting
Individual feature lights can compliment the style of your kitchen.
Plinth lighting
The plinths are the boards at the bottom of units that sit on the floor, and lights here can create a nice subtle ambience.
Worktop lighting
Lights at the front edge of a worktop can give a wow factor.
3. Measure Up

Calculate the approximate area of your room.
It doesn’t need to be perfect at this stage as most kitchen companies will do a home visit to take accurate measurements, but this will give you an idea to base your costs on.
4. Know Your Budget
Your budget needs to cover all aspects of the project and ass well as the actual kitchen and appliances, you’ll need to consider:
- Installation Fee
- Preparation Works – plastering, plumbing, electrical works, gas engineer etc.
- New lighting
- Old kitchen disposal
- Decoration – Painting, Tiling
- Flooring
- Contingency for the unexpected such as an asbestos check or old electrics that need replacing
5. Get Quotes
This can take time and patience, but you’re undertaking a big investment so be diligent. If you’ve got an idea of what you’d like and done your research before sitting with a designer, the experience will be smoother.
Until a professional has been to your house and assessed the need of any preparation works, you wont have a complete quote. This catches many people out, as these costs can add up into thousands of pounds.
Guarantees vary across suppliers so check the small print, including any labour costs needed to re-install any faulty items.
6. Find a Local Kitchen Installer
Most high street kitchen retailers use sub-contractors to fit their kitchens. The sub-contractors typically know the product well and manage all the preparation works for you. However, with no personal reputation at stake and no incentive to go above and beyond, it’s often better to hire an installer directly. Not only is it cheaper, but you’ll likely have someone who cares as much about your kitchen as you do. Ask around for recommendations, look at reviews & previous jobs they’ve completed.
If you engage with a reputable installer they will double check any measurements, review your design and be able to run the whole project for you.
In Summary, there are many choices to be made when planning a new kitchen! But by understanding a little about each step, you can make sensible decisions and find a kitchen thats perfect just for you.